


How to Install a LED Strip – A Step-by-Step Guide
LED strips are a modern, versatile, and energy-efficient lighting solution. Whether you're looking for accent lighting, functional illumination, or a stylish atmosphere – installation is simple with the right instructions. In this blog post, we’ll walk you through the step-by-step process of installing LED strips, explore mounting options, and highlight what to watch out for – including safety guidelines, IP and IK ratings, smart home integration (WiFi & Zigbee), and installing RGB, RGBW and Tunable White LED strips.

Safety Precautions Before Installation
Before you start mounting LED strips, it's important to keep a few safety measures in mind:
- Turn off the power – Switch off the power supply before beginning the installation. This helps prevent electric shocks and short circuits.
- Use insulated tools – Always use insulated tools, especially when working with electrical wiring.
- Check components for damage – Inspect the LED strip, power supply, and controller for any visible defects before starting.
- Check the IP rating – Make sure the LED strip is suitable for the environment where it will be used (see IP ratings below).
- Avoid heat build-up – Always unroll the LED strip fully before turning it on to prevent overheating.
Step-by-Step Installation Guide for LED Strips
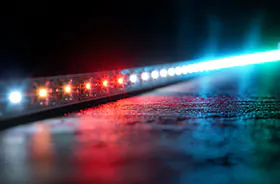
1. Measure and Cut to the Correct Length
Measure the area where you plan to install the LED strip. Most LED strips have cut marks where they can be safely shortened. Use sharp scissors and be careful not to damage the copper tracks.
![]()
Note: When unrolling the LED strip, avoid bending it too sharply or exceeding the recommended bend radius. Inside the strip is solid copper wiring that can break the product, damaging internal contacts and reducing functionality.
2. Mounting the LED Strip
Depending on the surface, there are several mounting options:
- Self-adhesive backing – Most LED strips come with 3M adhesive backing, suitable for smooth, clean surfaces like walls, ceilings, or furniture.
- Mounting clips for LED strips – If the adhesive isn’t strong enough (e.g., on rough or damp surfaces), use additional mounting clips.
- Mounting on wood – For wood surfaces, consider using mounting glue or double-sided tape for better hold.
- Mounting on the ceiling – Make sure the adhesive is strong enough, or use special LED strip brackets to secure the strip overhead.
Our advise: Use an aluminum profile. The strip can be put in this frame with its own adhesive backing. If you choose to not use a profile you must check your mounting option.
3. Connect the LED Strip
Connect the LED strip to the appropriate power supply, and if necessary, to a controller. Ensure the voltage of the power supply matches the LED strip’s specifications (e.g., 12V or 24V).
You can find a large selection of LED strip connectors here.
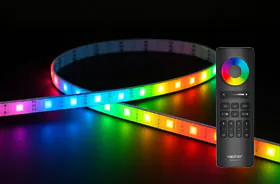
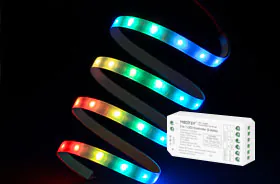
4. Configure the Controller (for RGB or Smart Home LED Strips)
If you're installing RGB, RGBW, dual white and if you want the single colour to be dimmed or smart LED strips (WiFi/Zigbee), a controller unit is required. Buy your LED strip controller here.
- Connect the RGB controller – Match the color-coded wires (R = red, G = green, B = blue, W = white/yellow) to the correct terminals on the controller.
- Set up smart home systems (WiFi & Zigbee) – If your LED strip can be controlled via an app, connect it to the Tuya Smart App or a compatible platform (e.g., Google Home, Alexa). More details below or in our blog "Controlling your lights; choosing Zigbee or Wifi?".
Tip: If you have a smart LED strip with zigbee, please note that you need a zigbee bridge in your house.
IP Rating: What Protection Level Do You Need?
The IP rating (Ingress Protection) indicates how well the LED strip is protected against dust and water.
Depending on where it's used, you’ll need a specific protection level:
| IP Rating | Usage Area |
| IP20 | Indoor use only (e.g., living rooms, offices). Not moisture-resistant. |
| IP44 | Splash-resistant. Suitable for bathrooms (outside wet zones). |
| IP65/IP67 | Waterproof. Ideal for outdoor areas, bathrooms, and kitchens. |
| IP68 | Fully waterproof. Suitable for underwater use (e.g., pools). |
Installing RGB and RGBW LED Strips
Installing RGB LED Strips
- Requires an RGB controller to set colors and effects.
- Connect wires according to the markings (R, G, B, V+).
- Once installed, the RGB LED strip can be controlled via remote or app.
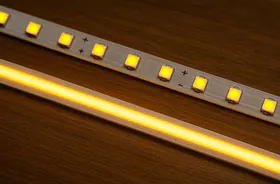
Installing RGBW LED Strips
- RGBW strips include an additional white LED for purer white light.
- Use an RGBW controller that includes a channel for white.
Installing Tunable White LED Strips
While the basic installation steps are similar compared to RGB/RGBW and Single-Color Strips, tunable white LED strips require a different type of controller and wiring:
-
Dual-channel control – CCT LED strips have two types of white LEDs (warm and cool) on the same strip. Unlike single-color strips that only need one channel, tunable white strips need two output channels for the controller and dimmer to adjust the color temperature by balancing the two LED types.
-
Special controller required – You’ll need a CCT controller (not an RGB or RGBW controller) that can smoothly mix warm and cool white tones. Some smart controllers also support app-based control and automation based on time of day or ambient light.

Installing Cut or Extended LED Strips
- Cutting: Only cut LED strips at the designated marks to maintain functionality.
- Extending: LED strips can be extended using connector clips or solder joints. But be aware: a single continuous strip should not exceed 10 meters.
- Ensure a stable power supply, as longer lengths require more wattage - For example, 7 meters of LED strip at 10 watts per meter = 70 watts total power requirement.

Disclamer: This guide provides a detailed step-by-step explanation for installing LED strips. However, safety is always the top priority when working with electricity. If you're unsure or inexperienced with electrical installations, we strongly recommend consulting a qualified electrician.
Sarah - last updated April 2025
Disclaimer
The information provided in our blogs is for general guidance only and may not apply to every situation, installation, or environment. We do not accept any liability for damages, injuries, or losses resulting from the use of this information. Electrical work and lighting installation should always be carried out by a qualified professional. For tailored lighting advice, please contact our team directly or consult a certified local installer.